DIY jacquard pencilcase

Friday is DIY time.
Do you like useful and beautiful items?
You can find both in our tutorial. Pencil case is very practical and our beautiful Jacquards will undoubtedly add it a lot of charm. To create pencil case you will need a few tools which can be found in every home, some wrap scraps and the sewing machine. Even you don’t have your own sewing machine, try to find a sewing cafe nearby or ask a nice aunty or a neighbour. She will not only make a sewing machine available to you but for sure will be happy to help! Enjoy!
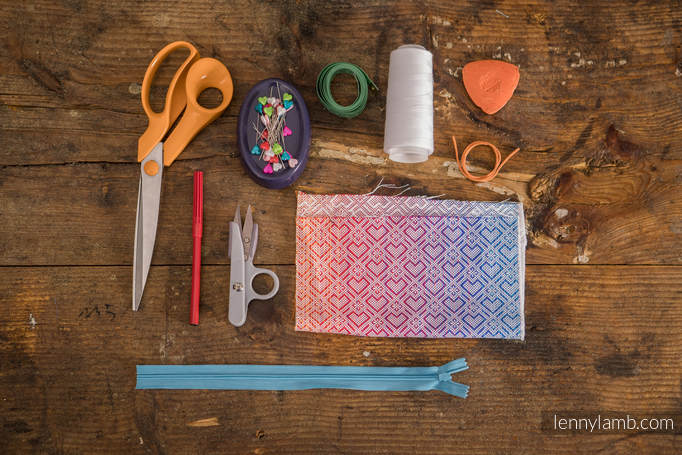
You will need:
Two pieces of fabric measure 30cm x 20cm; we will make quite a big pencil case
Ribbon or leather cord
Zipper
Scissors and seam ripper
Marker or tailor’s chalk
Tape measure
Sewing pins
Sewing machine and threads
You can watch the speed up video on our YouTube Channel. Below you will find the version for those who loves photos with all steps in details.
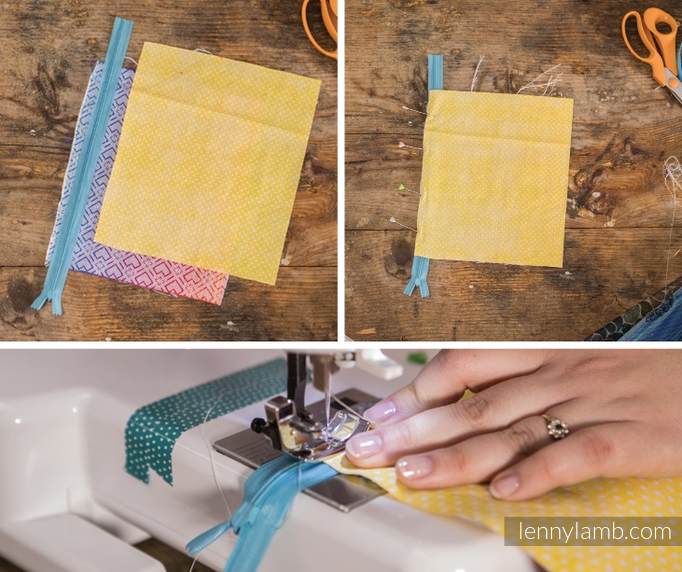
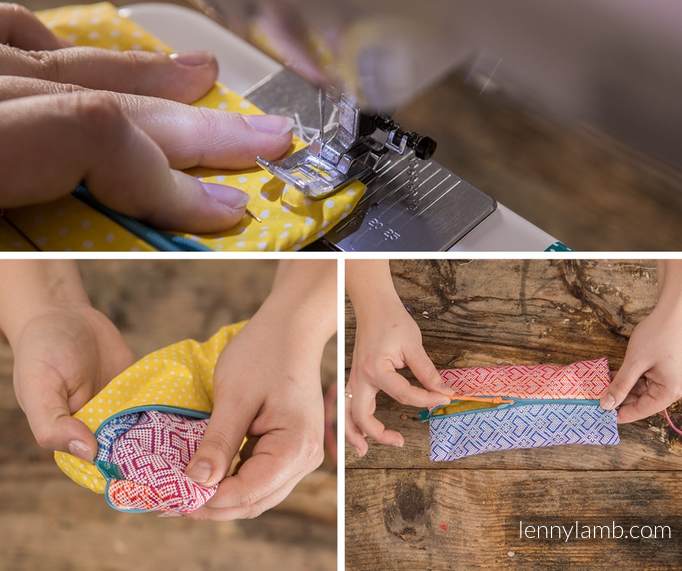
Put the fabric face ups to each other and place a zipper between the them. The top of the zipper should be placed on the fabric which will make the top of the pencil case.Pop in sewing pins and sew a stitching with the sewing machine. For sewing in the hidden zipper a special zipper foot is needed. In our tutorial a standard foot was used. And we can see the cool zipper colour!
Reverse the fabric so the right/outer side of pencil case is on the top. Fold the fabric right to right side and pop in the sewing pins along the second edge of the zipper. Repeat the action with the lining: fold the fabric in half with the right sides and pin it to the egde of the zipper.
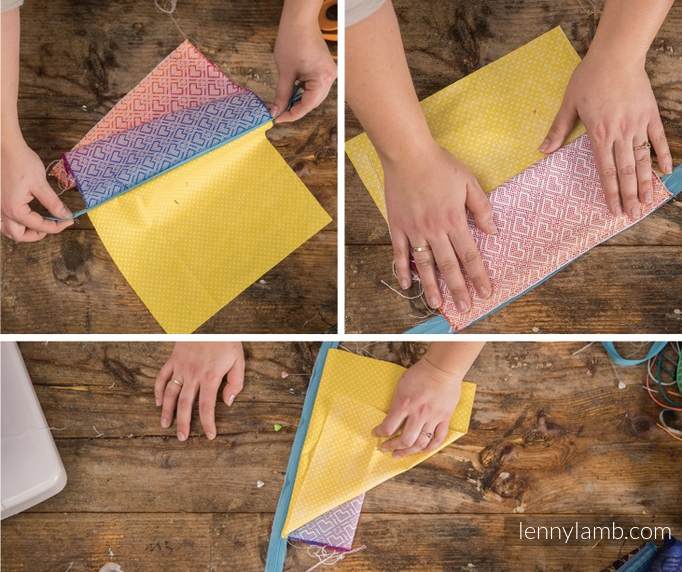
After sewing the fabric turn it around to the right side. The lining should be placed inside the pencil case.
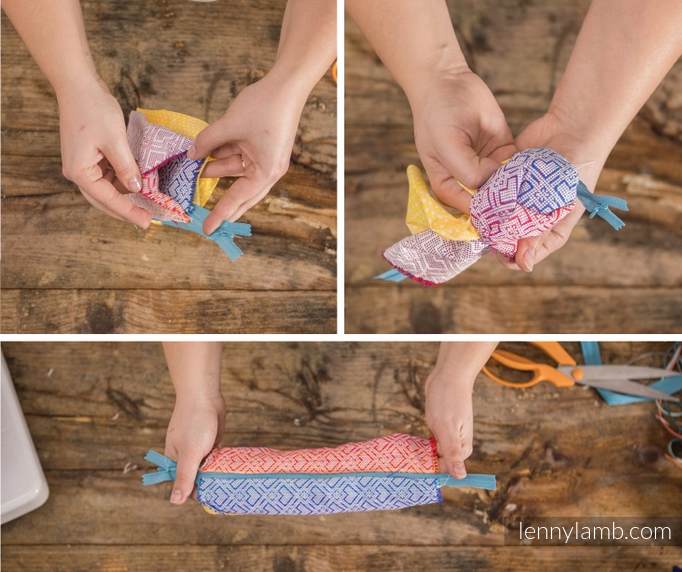
Check the pencil case. Check accurately if all the edges are sewn. Place the pencil case with the zipper closed. Measure the distance so the zipper is in the centre. Pop in the sewing pins on the both ends and sew it on the the sewing machine. Add decoration ribbons on both ends on the zipper to make it easier to use.
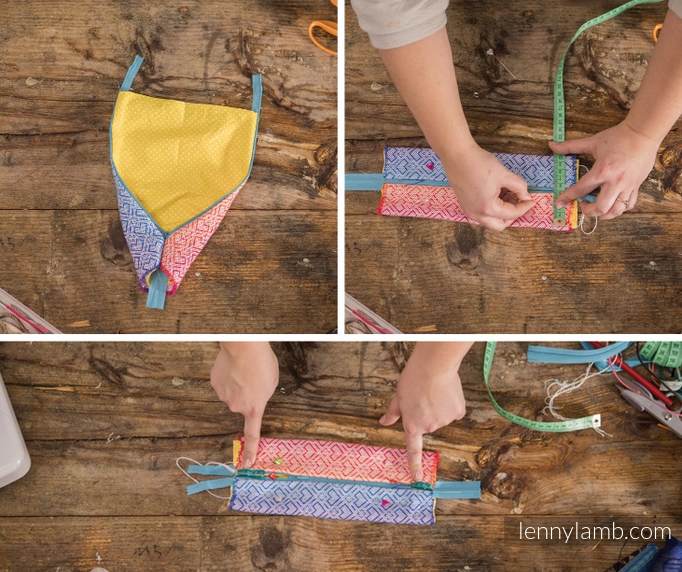
After sewing even both edges (width 0,7cm). Reverse the pencil case to left side. The edges are hidding in the stitching and it is important to fold them evenly.

Sew the pencil case edges (width 1cm) with the end the stitches fixed. Reverse the pencil case to the right side and twine the decoration ribbon or leather cord through the zipper to make it easier to use.
Congratulation! Now you made the pencil case and got to know how to make basic forms - like many versions of pencil cases, wash bags and bags!
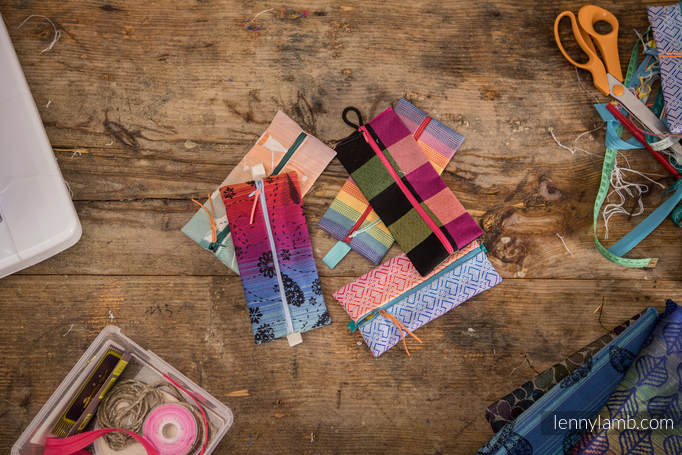
Share your pencil case from FabricArt fabric on our facebook fanpage!
https://www.facebook.com/FabricArt-622804757812359/?fref=ts
And stay tuned! More great tutorials are coming! See you next Friday!
FabricArt Team!